Memang sudah banyak situs yang menyediakan tools secara gratis untuk download video di youtube, mulai dari downloader online, software, maupun add-ons dan plugin untuk suatu browser.
Tetapi bagaimana cara download video di youtube tanpa menginstall software maupun add-ons terlebih dahulu? anda bisa memanfaatkan javascript untuk mendownload video tersebut.
Caranya adalah sebagai berikut :
1. Buka video di youtube yang anda inginkan. Misalnya :
http://www.youtube.com/watch?v=E3keLeMwfHY
2. Setelah itu Copy dan Paste javascript berikut ini di Browser anda (Ganti URL browser anda dengan salah satu javascript di bawah ini).
Download Regular Quality Youtube Video Direct Links [RQ] :
javascript:window.location.href = 'http://youtube.com/get_video?video_id=' + yt.getConfig('SWF_ARGS')['video_id'] + "&l=" + yt.getConfig('SWF_ARGS')['l'] + "&sk=" + yt.getConfig('SWF_ARGS')['sk'] + '&t=' + yt.getConfig('SWF_ARGS')['t'];
Download High Quality Youtube Video Direct Links [HQ] :
javascript:window.location.href = 'http://youtube.com/get_video?video_id=' + yt.getConfig('SWF_ARGS')['video_id'] + "&fmt=18&l=" + yt.getConfig('SWF_ARGS')['l'] + "&sk=" + yt.getConfig('SWF_ARGS')['sk'] + '&t=' + yt.getConfig('SWF_ARGS')['t'];
Download High Definition Youtube Videos Direct Links [HD] :
javascript:window.location.href = 'http://youtube.com/get_video?video_id=' + yt.getConfig('SWF_ARGS')['video_id'] + "&fmt=22&l=" + yt.getConfig('SWF_ARGS')['l'] + "&sk=" + yt.getConfig('SWF_ARGS')['sk'] + '&t=' + yt.getConfig('SWF_ARGS')['t'];
3. Kemudian tekan Enter. Maka nanti akan muncul pertanyaan untuk menyimpan file video tersebut.
4. Klik OK dan video akan mulai di download.
Yuk download veideo Youtube dengan Java
Wednesday, April 7, 2010
Show Hidden File pada Windows Vista
Friday, April 2, 2010
Berikut langkah - langkah " Show Hidden File " pada Windows 
- Close all programs so that you are at your desktop.
- Click on the Start button. This is the small round button with the Windows flag in the lower left corner.
- Click on the Control Panel menu option.
- When the control panel opens you can either be in Classic View or Control Panel Home view:
If you are in the Classic View do the following:
- Double-click on the Folder Options icon.
- Click on the View tab.
- Go to step 5.
If you are in the Control Panel Home view do the following:
- Click on the Appearance and Personalization link.
- Click on Show Hidden Files or Folders.
- Go to step 5.
- Double-click on the Folder Options icon.
- Under the Hidden files and folders section select the radio button labeled Show hidden files and folders.
- Remove the checkmark from the checkbox labeled Hide extensions for known file types.
- Remove the checkmark from the checkbox labeled Hide protected operating system files. Once this is done, your Folder Options screen should look similar to the following image.

- Press the Apply button and then the OK button.
Disable iklan pada Antivirus Avira
Thursday, April 1, 2010
Windows 2000 / Windows XP Pro
- Go to Start > Run
- Type gpedit.msc and click OK.
- Navigate through User Configuration > Administrative Templates > System.
- Double click "Don't run specified Windows applications".
- Enable it and click show.
- Add "avnotify.exe".
- Click OK on all open windows.
Alternate:
- Start > Run: secpol.msc (You can also access this program through 'Control Panel > Administrative Tools > Local Security Policy' this is useful if it is easier the location of this rather than the file name)
- Right click "Software Restriction Policies," Choose "New Software Restriction Policies." (Skip this step if there are subfolders in Software Restriction Policies already.)
- Right Click "Additional Rule" folder > New Path Rule.
- Where it says Path, Type the path of avnotify.exe on your computer, or use the Browse button to find it. (On XP64 using a default install of Avira, the path is: (C:\Program Files (x86)\Avira\AntiVir PersonalEdition Classic\avnotify.exe)
- Make sure the "Security Level" Dropdown menu is selected as "Disallowed"
- If you would like to make sure it went through correctly, open the Additional Rules folder, and verify the path and security level.
- Enjoy the absence of nag windows.
Convert Filesystem FAT jadi NTFS ?
Wednesday, March 31, 2010
To convert an existing FAT or FAT32 volume to NTFS, follow these steps:
- Click Start, point to All Programs, point to Accessories, and then click Command Prompt.
- At the command prompt, type the following, where drive letter is the drive that you want to convert:convert drive letter: /fs:ntfsFor example, type the following command to convert drive E to NTFS:convert e: /fs:ntfsNote If the operating system is on the drive that you are converting, you will be prompted to schedule the task when you restart the computer because the conversion cannot be completed while the operating system is running. When you are prompted, click YES.
- When you receive the following message at the command prompt, type the volume label of the drive that you are converting, and then press ENTER:
- When the conversion to NTFS is complete, you receive the following message at the command prompt:
- Quit the command prompt.
Show Hidden File pada Windows Vista
Berikut langkah - langkah " Show Hidden File " pada Windows
Pake bahasa Inggris gak papa yah ... sekalian belajar bahasa Inggris ....
Saatnya berburu file hidden !!!!
If you are in the Classic View do the following:
If you are in the Control Panel Home view do the following:
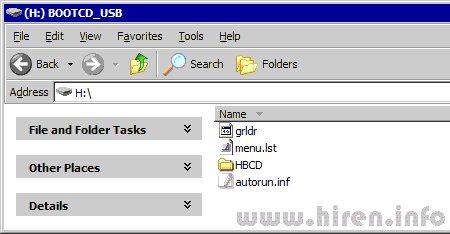
Membuat USB Hiren's Boot [ english content ]
Thursday, March 11, 2010
Step 1
Connect USB Pen Drive (256Mb or more)
Step 2
Download and Run USB Disk Storage Format usb_format.zip![]() (34KB)
(34KB)

Step 3
Download and Run grubinst_gui ![]() grub4dos.zip (147KB)
grub4dos.zip (147KB)

Step 4
Copy grldr and menu.lst (from grub4dos.zip) to the usb drive
Step 5
Insert the BootCD (9.7 or newer) in the CD Drive and Copy everything from CD to USB Flash Drive
Step 6
Test Your USB Drive (read bottom of the page for troubleshoot)
Cara Setting Gmail di Microsoft Outlook 2003
Cara ini dapat dilakukan dengan akun email gmail berformat –> xxxxx@gmail.com ataupun dengan format kolaborasi domain Anda dengan gmail server
Catatan :
Untuk aku email yang kolaborasi domain Anda dengan gmail server harus dilakukan setting terlebih dahulu guna mengarahkan MX record mail server ke server milik google, namun bila pelanggan kami semua otomatis telah kami lakukan)
Setting pada Webmail :
Buka panel webmail Anda dan silahkan login.
Bbila pelanggan kami defaultnya adalah http://mail.namadomain.com atau untuk akses langsung ke gamila gunakan ddefault URL dari gmail dengan format http://mail.google.com/a/namadomain.com, kemudian setelah masuk login, silahkan klik –> Pengaturan (Bila dalam Bahasa Indonesia) seperti gambar dibawah ini

Klik Tab –> Meneruskan dan POP/IMAP
Pilih Status POP, Anda dapat memilih pilihan pertama ataupun pilihan kedua, setelah itu simpan perubahan. dan selesailah kita melakukan setting pada webmail.

Setting pada Outlook :
Silahkan buka Program outlook, lalu pilih –> Tools –> Email Accounts

Pilih –> Add a new e-mail account lalu klik Next

Pilih POP3

Lakukan isian seperti contoh berikut, gunakan isian Your Name, User Name dan Email Address sesuai domain Anda. sedangkan isian POP3 dan SMTP biarkan sama, setelah itu klik –> More Settings

Silahkan ke Tab –> Outgoing Server dan Centang My outgoing server (SMTP) requires authentication, kemudian pilih juga Use same settings as my incoming mail server

Lanjutkan ke Tab –> Advanced , isikan data sesuai contoh

Setelah setting selesai, coba lakukan test dengan melakukan klik di tombol –> Test Account Settings
 Selamat !!! Anda telah berhasil membuat account Gmail terintegrasi dengan Microsft Outlook 2003

Thanks to dibekasi.net
